
Cart
0
TL;DR:
- Bone broth for pho is made by long-simmering beef bones to extract collagen and protein. Proper technique, including parboiling, charring aromatics, and simmering for hours, ensures a clear, flavorful, and nutritious broth. Using homemade broth and following the steps results in a deeper, healthier dish.
Pho with bone broth is defined as the traditional Vietnamese noodle soup built on a base of slow-simmered beef bones, producing a liquid rich in collagen, gelatin, and protein. Standard stock simmers for one to two hours and yields 2–6 grams of protein per cup. Bone broth, simmered for three to four hours or longer, delivers 8–10 grams of protein per cup, making it a meaningfully more nutritious base. That difference matters for home cooks who want a bowl that nourishes as well as satisfies. This guide covers the nutritional case for bone broth, the exact ingredients and technique needed, and the most common mistakes to avoid.
What makes bone broth the best base for pho?
Bone broth earns its place as the foundation of great pho through both nutrition and flavour. The collagen amino acids glycine, proline, and glutamine support tissue repair and gut health in ways that a quick-cooked stock simply cannot match. Nutritionist Julia Zumpano notes that bone broth’s collagen and amino acid profile makes it a digestion-supportive liquid that is superior to typical stocks. That is not a marketing claim. It is a structural difference caused by cooking time.
The gelatin released during a long simmer does two things at once. It gives the broth a silky, slightly viscous texture that coats rice noodles beautifully, and it supports digestion in a way that shorter-cooked stocks cannot replicate. A standard chicken or vegetable stock lacks the gelatin extraction that only comes from prolonged bone contact with water.
Bone selection also shapes the final result. A 60:40 ratio of knuckle to marrow bones balances collagen richness from the knuckles with fat-soluble flavour compounds from the marrow. Too many marrow bones and the broth turns greasy. Too few and it tastes thin. That ratio is not arbitrary. It reflects the structural difference between the two bone types.
One caution applies to store-bought options. Commercial bone broths often carry high sodium, which can push a single bowl well past recommended daily limits. Registered dietitian Caroline Susie highlights that homemade broth gives you full control over salt and ingredients, whereas commercial products vary widely. Making your own is the most reliable way to get the nutritional benefits without the sodium trade-off. For a detailed comparison of bone broth versus stock, the difference in preparation time and technique is the deciding factor.
Pro Tip: Chill your finished broth overnight. A well-made bone broth will set to a firm jelly in the fridge. If it does not set, the collagen extraction was insufficient and the simmer time needs extending.
What ingredients and equipment do you need for authentic pho?
Authentic pho with beef bone broth requires a specific set of bones, spices, and aromatics. Each component has a defined role. Substituting freely changes the flavour profile in ways that are difficult to correct later.
Bones and quantities
Use 5–6 pounds of mixed beef bones per batch. The recommended split is 60% knuckle bones and 40% marrow bones. Knuckle bones provide the collagen that gives the broth its body. Marrow bones add depth and a subtle richness that knuckles alone cannot produce.
Spices and aromatics
The spice blend is what separates pho from any other beef broth. Toasting black cardamom before adding it to the pot releases camphor and smoky notes that most home recipes miss entirely. Those notes define authentic pho depth. The full spice list includes:
- Black cardamom (toasted directly over a flame or dry pan)
- Star anise
- Cinnamon stick
- Coriander seeds
- Whole cloves
Charred onion and ginger are equally non-negotiable. Holding them over a gas flame or under a grill until blackened creates Maillard reaction compounds that add a smoky, caramelised depth to the broth. Skipping this step produces a flat, one-dimensional result.
Equipment
| Item | Purpose |
|---|---|
| Large stockpot (8–10 litres) | Holds bones, water, and aromatics with room to skim |
| Mesh strainer or muslin cloth | Produces clear, clean broth at the end |
| Spice sachet or tea infuser | Keeps whole spices contained for easy removal |
| Slow cooker (optional) | Maintains a consistent bare simmer without monitoring |
| Ladle and skimmer | Removes foam and fat during cooking |
A slow cooker is a practical alternative for the simmering stage. It holds the temperature at a consistent level without the risk of accidentally boiling the broth.
How to make pho broth from scratch: step-by-step
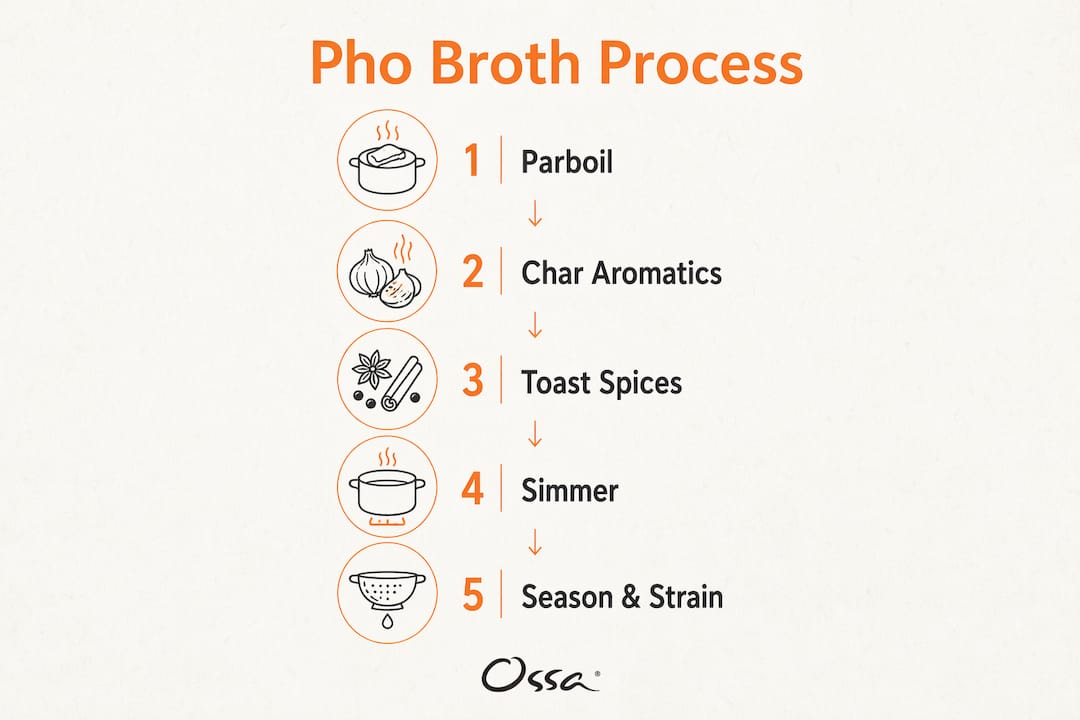
Making a proper bone broth pho recipe at home takes time but not complexity. The process has five distinct stages: parboiling, charring, toasting, simmering, and seasoning. Each stage is short. The simmering stage is the only one that requires patience.
Step 1: Parboil the bones
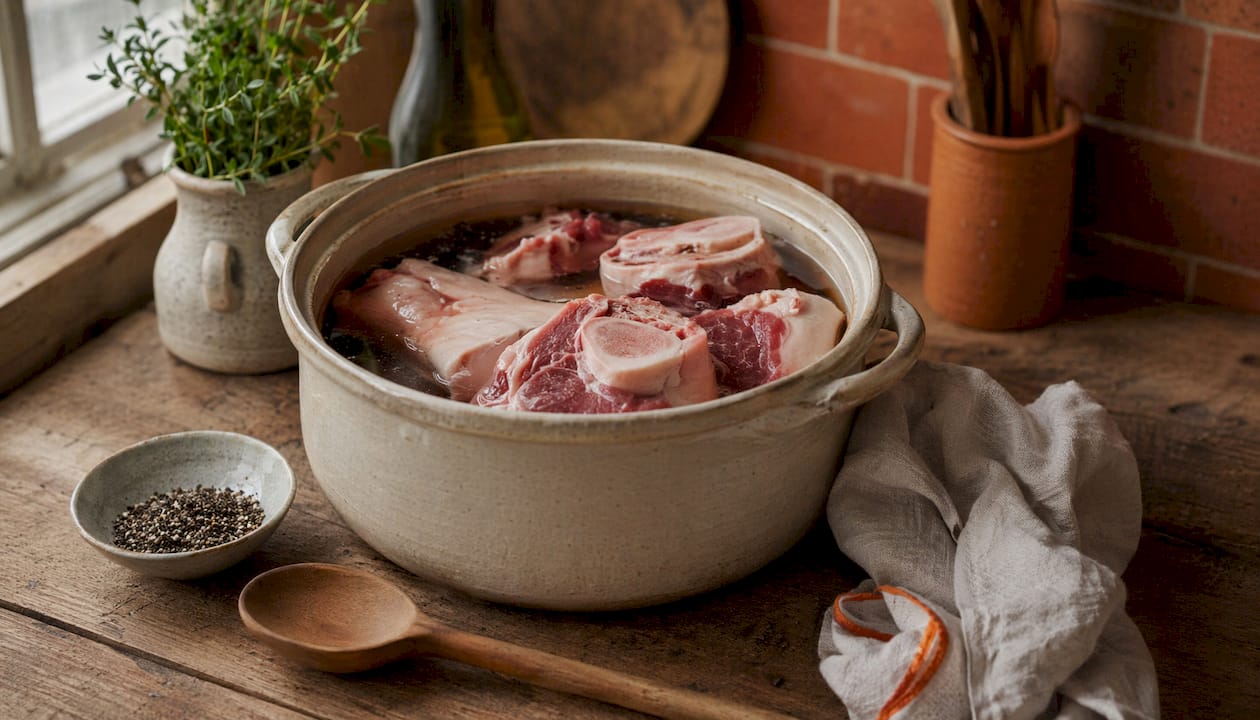
Place all bones in a large pot and cover with cold water. Bring to a full boil and cook for 10 minutes. Parboiling removes coagulated proteins and blood that would otherwise cloud the finished broth. Drain the water completely, then rinse each bone under cold running water. This step is the single biggest factor in achieving a crystal-clear result.
Step 2: Char the aromatics
Halve one large onion and a 10cm piece of fresh ginger. Place them cut-side down directly over a gas flame or under a hot grill. Char until the surfaces are blackened in patches, roughly 5–7 minutes. The charring is not burning. It is a controlled Maillard reaction that builds flavour compounds unavailable from raw aromatics.
Step 3: Toast and prepare the spices
Place the black cardamom pods in a dry pan over medium heat. Toast for 2–3 minutes until fragrant. Add the star anise, cinnamon, coriander seeds, and cloves to the same pan and toast for a further minute. Transfer all spices to a spice sachet or muslin bag. Toasting activates volatile oils that would otherwise remain locked in the spice.
Step 4: Simmer
Place the rinsed bones in the clean stockpot. Cover with cold water and bring slowly to temperature. Once the liquid reaches a simmer, add the charred onion, charred ginger, and the spice sachet. Simmer for 3–4 hours at a bare simmer, meaning small bubbles breaking the surface every 2–3 seconds. Skim the surface every 20–30 minutes to remove any fat or foam that rises.
Pro Tip: Never let the broth reach a rolling boil during the simmering stage. Aggressive boiling emulsifies the fat into the liquid, producing a cloudy, greasy broth that cannot be reversed.
Step 5: Season and strain
Add fish sauce and a small piece of rock sugar only in the final 30 minutes of cooking. Early salting draws out moisture and concentrates salt as the broth reduces, making the final seasoning difficult to control. Taste and adjust the balance of salty, sweet, and savoury before straining. Pour the broth through a fine mesh strainer or muslin cloth into a clean pot. Discard the solids.
| Stage | Duration | Key action |
|---|---|---|
| Parboiling | 10 minutes | Remove impurities, rinse bones |
| Charring aromatics | 5–7 minutes | Develop Maillard flavour compounds |
| Toasting spices | 3–4 minutes | Activate volatile oils |
| Simmering | 3–4 hours | Extract collagen, gelatin, and flavour |
| Seasoning and straining | 30 minutes | Balance flavour, clarify broth |
The finished broth stores in the fridge for up to three days or in the freezer for up to three months. Store it without noodles or herbs, which deteriorate quickly and absorb liquid.
Common mistakes when making pho with bone broth
Most failed batches trace back to one of four errors. Identifying the cause makes the fix straightforward.
- Cloudy broth. The two most common causes are skipping the parboil and boiling the broth instead of simmering. Skipping parboiling leaves coagulated proteins in the pot. Boiling emulsifies fat into the liquid. Both produce murky results that cannot be corrected after the fact.
- Over-salted broth. Adding fish sauce too early concentrates the salt as the liquid reduces. Always season in the final 30 minutes, after the volume has stabilised.
- Flat or one-dimensional flavour. This usually means the aromatics were not charred, the spices were not toasted, or the simmer time was too short. Each of these steps builds a distinct flavour layer. Skipping any one of them leaves a gap.
- Greasy texture. Too high a proportion of marrow bones, or insufficient skimming during the simmer, produces a fatty mouthfeel. Chilling the broth overnight and lifting the solidified fat cap before reheating solves this cleanly.
“A bare simmer with small bubbles every 2–3 seconds prevents cloudiness by avoiding fat emulsification and preserves the delicate aromatic notes that define authentic pho broth. Aggressive boiling undoes hours of careful work in minutes.”
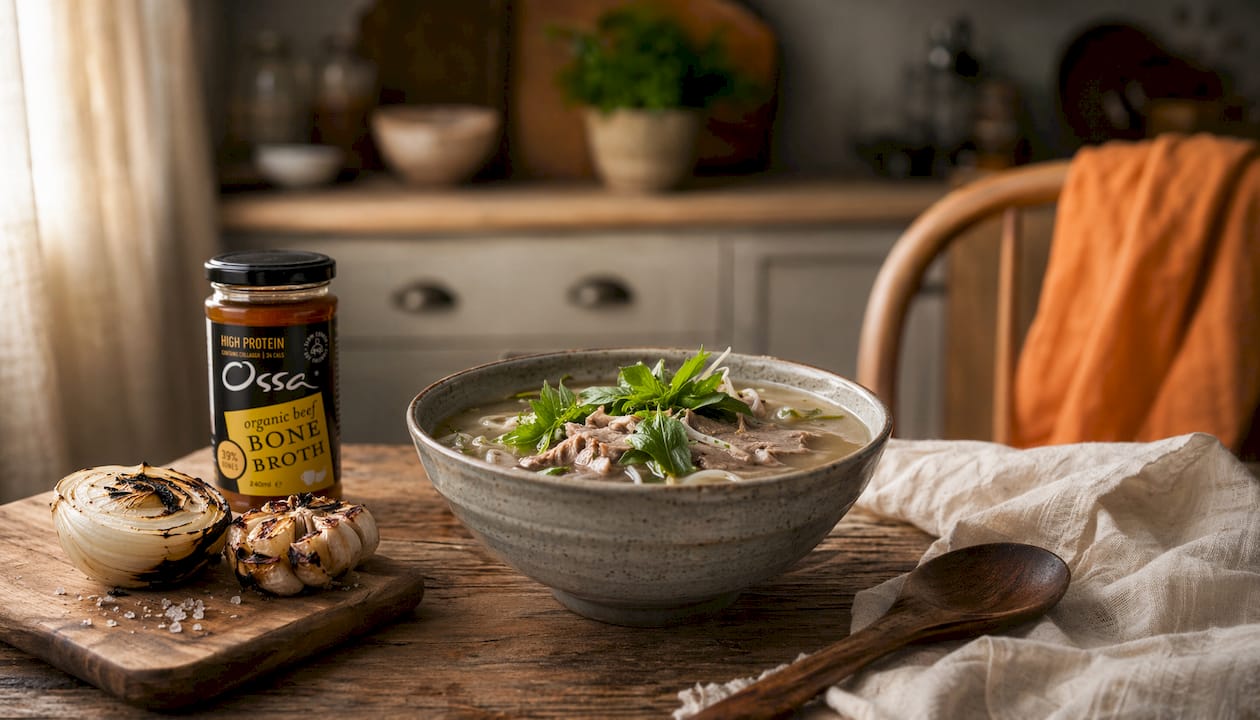
For home cooks short on time, a high-quality organic bone broth used as a ready-made base is a practical shortcut. The trade-off is less control over sodium and spice intensity. Adding freshly toasted spices and charred aromatics to a pre-made broth recovers much of the flavour depth without the full preparation time.
How to serve pho for the best flavour and texture
The broth is the foundation, but the assembly determines the final experience. Serving pho correctly is as important as making the broth correctly.
The standard components for a traditional bowl are:
- Rice noodles (bánh phở). Use flat, medium-width dried or fresh rice noodles. Soak dried noodles in cold water for 20–30 minutes before cooking, then blanch briefly in boiling water. Overcooked noodles turn mushy within minutes of hitting hot broth.
- Thinly sliced beef. Brisket, cooked low and slow in the broth itself, is the most traditional choice. Raw beef eye of round, sliced paper-thin and placed in the bowl before the hot broth is poured over, is equally authentic. The heat of the broth cooks the raw slices in seconds.
- Fresh herbs and garnishes. Serve bean sprouts, fresh Thai basil, sliced red chilli, and lime wedges on a separate plate. Each person adds their own at the table. This keeps the herbs fresh and the broth clear.
- Condiments. Hoisin sauce and sriracha are the standard table additions. Add them to a small side dish rather than directly into the broth to preserve the broth’s flavour balance.
Reheat the broth gently to a near-simmer before serving. Never boil it again. Boiling after straining re-emulsifies any residual fat and dulls the aromatic notes built during the long simmer. Ladle the hot broth over assembled noodles and meat directly in the bowl, not in the pot.
For a lighter variation, chicken bone broth works well as an alternative base. The flavour profile is cleaner and less rich, which suits those who find beef pho too heavy. The same spice blend and charring technique applies. You can find practical ideas for using bone broth in recipes across a range of dishes beyond pho.
Key takeaways
Pho made with bone broth delivers superior protein, collagen, and gelatin compared to standard stock, provided the preparation follows the correct technique at every stage.
| Point | Details |
|---|---|
| Bone broth protein advantage | Bone broth provides 8–10g of protein per cup, compared to 2–6g in standard stock. |
| Bone ratio matters | A 60:40 knuckle-to-marrow split balances collagen richness with fat-soluble flavour. |
| Parboiling is non-negotiable | Skipping the 10-minute parboil is the leading cause of cloudy, impure broth. |
| Simmer, never boil | Bubbles every 2–3 seconds extract collagen without emulsifying fat into the liquid. |
| Season last | Add fish sauce and rock sugar only in the final 30 minutes to control salt concentration. |
What years of making bone broth pho have taught me
The most common misconception about pho is that the complexity lives in the spice blend. It does not. The spices matter, but they are the finishing layer. The real work happens in the first 15 minutes: the parboil, the rinse, and the decision to hold the heat at a bare simmer for the entire cook. Get those three things right and the broth will be clear, deep, and genuinely nourishing. Get them wrong and no amount of star anise will save it.
The charring step surprises most home cooks the first time they do it. Holding an onion over a gas flame until it blackens feels wrong. It looks like a mistake. But the Maillard compounds created in those few minutes are irreplaceable. They are what gives restaurant-quality pho that smoky, slightly sweet undertone that home versions so often lack. Once you understand why it works, you will never skip it.
Patience with the simmer time is the other non-negotiable. Three hours feels long. Four hours feels longer. But collagen extraction improves significantly after the first hour and continues building until the four-hour mark. Pulling the broth early produces a thinner, less satisfying result. The difference between a two-hour and a four-hour broth is not subtle. It is the difference between a good soup and a genuinely restorative one.
The nutritional benefits of bone broth are real, but they are inseparable from the technique. A poorly made broth does not deliver the same collagen or amino acid content as one made correctly. The tradition exists for a reason. Follow it.
— Ossa Organic
Ossa Organic bone broth: a ready-made base for your pho
Ossa Organic produces organic beef bone broth made from grass-fed bones, slow-simmered to extract the full collagen and protein content that authentic pho requires. Each 515ml carton is ambient-stable, which means it stores easily and is ready when you need it. For home cooks who want the nutritional benefits of a long-simmered broth without the full preparation time, Ossa Organic’s beef bone broth serves as a high-quality base. Add freshly toasted spices and charred aromatics directly to the heated broth and you recover the depth of flavour that defines the dish. The organic sourcing means no added preservatives, no artificial flavourings, and full transparency on ingredients. For those interested in gut health more broadly, Ossa Organic’s 14-day gut reset programme offers a structured approach to incorporating bone broth into daily nutrition.
FAQ
What is pho with bone broth?
Pho with bone broth is the traditional Vietnamese noodle soup made using a base of slow-simmered beef bones rather than a quick-cooked stock. The extended simmer extracts collagen, gelatin, and amino acids that give the broth its characteristic richness and nutritional profile.
How long does it take to make bone broth for pho?
The full process takes approximately 3–4 hours of simmering, plus 10 minutes for parboiling the bones. The finished broth stores in the fridge for up to three days or in the freezer for up to three months.
Why does my pho broth turn cloudy?
Cloudy broth is almost always caused by skipping the parboil, boiling the broth too aggressively during simmering, or both. Parboiling bones for 10 minutes and maintaining a bare simmer throughout are the two most effective preventive measures.
Is pho healthy when made with bone broth?
Pho made with bone broth provides 8–10 grams of protein per cup and contains collagen amino acids that support gut health and tissue repair. The main nutritional caution is sodium, particularly with commercial broths, so homemade or low-sodium options are preferable.
Can I use chicken bone broth instead of beef for pho?
Chicken bone broth produces a lighter, cleaner version of pho that works well as an alternative. The same preparation technique applies, including charring the aromatics and toasting the spices, though the simmer time can be reduced slightly for chicken bones.